Monthly Archives: September 2020
Depth of field
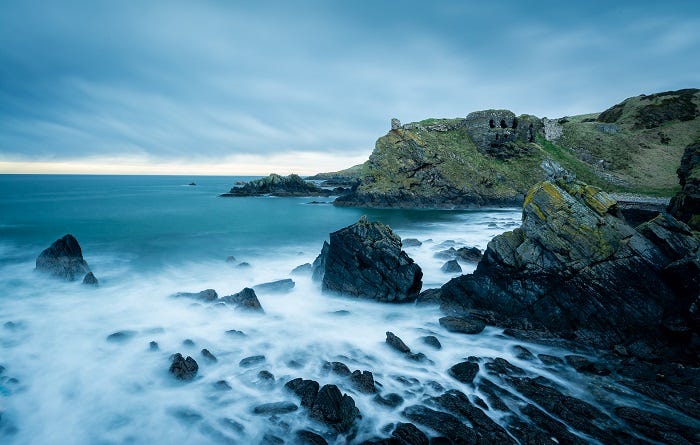
The meaning of depth of field is the distance between the nearest and the furthest objects that give an image judged to be in focus in a camera. The distance between the camera and the first element that is considered to be acceptably sharp is called DoF near limit. The way it zooms , the further away you are from a subject the larger the depth of field . Focal Length – the shorter the focal length the larger the depth of field. So with a zoom lens you have multiple focal lengths throughout the zoom range and so yes zooming in and out also affects the depth of field . Depth of field is controlled by changing the aperture setting on your camera. Like your eye, a camera lens has an iris inside that can open or close to let in more or less light. You control the size of this hole, or aperture, by changing the aperture setting, which is measured using a scale of f-stops. Using the aperture (f-stop) of your lens is the simplest way to control your depth of field as you set up your shot. Using a shallow depth of field is a good way to make your subject stand out from its background and is great for portrait photography. Larger apertures (smaller F-stop number) and closer focusing distances produce a shallower depth of field, depth of field only sets a maximum value for the circle of confusion ,
Texture
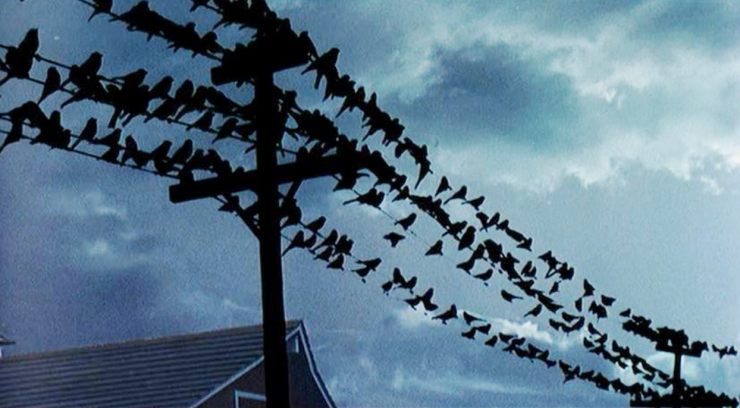
I picked these two pictures that i took because i think they show good texture . The picture of the snow was taken in Washington ,This gives me really clam vibes ,the way the snow looks , it just looks so amazing ,i feel like when you see it , it just grabs your attention many ways I picked this picture i took of my cat because i like the way the photo is just focus on her and the background is blurred , the way her whiskers pop out although they are very light , the way her eyes look , also the patterns on her skin look .
In the visual arts, texture is the perceived surface quality of a work of art. It is an element of two-dimensional and three-dimensional designs and is distinguished by its perceived visual and physical properties. Use of texture, along with other elements of design, can convey a variety of messages and emotions.
‘

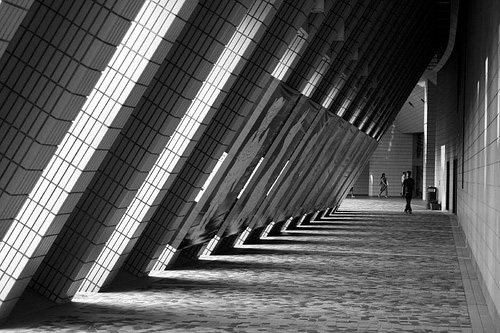
Shadow & Light

What every beginner needs to know .
You will need to understand f-stops, ISOs, exposure, focus modes, white balance, light, composition, focal length and how different lenses affect your images, posing for portraits, and many more things. 1.The shutter priority mode works just like aperture priority, in the sense that it gives you complete control over shutter speed while making all the other settings automatically, according to the selected value. This is a great setting for situations where you don’t want the shutter speed to go over or under a specific value. 2. The exposure it is a +/- scale that will tell your camera to increase or decrease exposure, depending on your needs. It works for all semi-automatic modes (P, Av, TV) and will influence exposure in increments. 3.Motion blur often comes from using a shutter speed that is too slow for holding the camera in your hands. Every photographer has a maximum low speed they can use. For some it’s 1/60th, but others can shoot hand held at 1/8th. It’s a question of practice. Learn what the lowest speed is for you and stick to it for motion free images. 4. Camera flash , If you’re not careful, using your camera’s built-in flash at night or in low light can lead to some unpleasant effects like red eyes and harsh shadows. If you find yourself in this situation and don’t want to miss the shot, there are a couple of things you can do. First of all, find the flash settings in your camera’s menu and reduce brightness as much as you can. Second, you can try diffusing the light from the flash by putting something over it. Securing a piece of paper or opaque scotch tape over the flash, for instance, can help diffuse the light and soften it. 5.The rule of thirds is based on the idea that pictures are generally more interesting and well balanced when they aren’t centered. Imagine a grid placed over your images with two vertical lines and two horizontal lines that divide the picture into nine equal section. 6.The histogram shows you a mathematical review of exposure after the photo has been taken. It tells you how evenly exposed a photo is.LCD screens aren’t very good at showing you this information through their display of the image. 7.Depth of field , When you’re shooting in low light, you have to widen your aperture to allow enough light into the lens. But this has a major side effect.You can use this in a creative way. 8.The white balance changes the color cast of the entire photo. It is responsible for the overall warmth. It can determine whether your photo appears blue or orange, cold or warm. Auto white balance doesn’t often do a good job. Especially with tungsten light. The sooner you learn about this basic photography idea, the more accurate your photos will look. 9.The basic premise is that you divide your camera’s frame into thirds. By planting key objects on these lines, the composition of the image works better.This is a tool that always works. But it is easy to overuse it. If you’ve not learned much about photography yet, it’s a great way of improving your photos. 10.Triangles make great compositional tools. They’re easy to make and manipulate and are quite common. These are a great way to use the simplest and most basic photography compositions.They are also perfect for combining different compositional techniques. These include lines and paths to create a more interesting part of a photograph 11.Eye-lines are the direction your subject’s eyes are pointed in. The negative space in front of the subject’s face is known as lead room. 12.Polarizing filters only allow light into the lens from a certain direction. This results in the removal of glare and reflections from non-metallic objects. 13.Exposure happens in three steps. We will start with the aperture. This is the hole inside the lens, through which the light passes.As the aperture widens, the f/number gets lower and more light is allowed into the camera. This is great for low light. But be aware that it’s going to make the depth of field very shallow. So , The aperture is the preferred setting to set first, as it directly influences how much of your scene is in focus. But, if you are looking to create motion blur, then it is second to the shutter speed.
What i learned about exposure
What i learned about exposure is that there’s three camera settings =Aperture , ISO , and shutter speed its called The “Expose Triangle ” . That Aperture means : Controls the area over which light can enter your camera , And Shutter Speed means : Controls the duration of the exposure . Lastly ISO means : Control the sensitivity of your camera senor speed to a given amount of light. In the triangle the three corner have the each name so the left corner would be (SP) and its as motion blur , (A) its as death of field as the top , finally the right corner as (ISO) is image noise. Those three parts are really important because they will control how each photo will look. Exposure is the amount of light a digital camera’s sensor captures when a photo is taken , Too much light results in a washed out photo (overexposed). Too little light and the photo will be too dark (underexposed). A tip i learned is “On a bright sunny day using a smaller aperture and short shutter speed may get you a good exposure” . Another one i learned was “Remember that sometimes natural light gives you the most beautiful results “. An tip that i learned that i thought would be so helpful was , “There are two Priority Modes on your camera that can help make shooting easier while still having some control over the exposure of your image. When you’re shooting in a priority mode you decide which exposure setting you want to control – Aperture or Shutter Speed, while the camera can automatically adjust the others to ensure a good exposure.” I learn the reason why the exposure triangle is because they work together to produce a photo that is properly exposed. If one variable changes, at least one of the others must also change to maintain the correct exposure. This the way i learned how to set exposure on a camera .
- Select your camera’s manual mode.
- Decide what exposure control you want to set first. …
- Set the first value. …
- Set the second exposure control. …
- Adjust the third exposure control to get the right exposure. …
- Take a photo.
- Review it. …
- Continue adjustments, if necessary.
Composition
)


Camera Simulator
5 Things i learned of Camera Simulator is that if you have your camera as very underexposed when you take the picture it will come as black . If you have your ISO at a high number your photo will come out washed out. Also i learned to get really good exposure the shutter speed should be at 1/200. What i thought was really helpful was when they give me the advice of “When shooting with slow shutter speed like this any movement of the camera will show. Make sure the camera is steadied or use a tripod”. The three main are